Friday, April 5, 2013

Vintage Mother's Day

Beginning today, I'm going to post some Mother's Day cards and gift ideas. Here is the first card. I hope you make one too, or more of course. :)

 Paper: brown, cardboard looking, vanilla, and black and white vintage cardstock paper.
Tools: Die cutting machine, scissors,  permanent adhesive, computer and printer.
Stamps: roses for inside the card
Stamp ink: brown
Embellishments: lace, vanilla fancy ribbon, brown and white pearls and a decorative button.
 

Use scissors or a craft knife (scissors work better) to distress the 4 sides of the vanilla paper as shown.

Use stamp ink or distress ink and a sponge to make the card insert look 'old'.
I printed the phrase 'Happy Mother's Day' , carefully cut around the letters, and pasted it on my card because I didn't find any stamp that I really liked.

Soon we will start our contest, and you can win a Mother's Day card. Meanwhile enjoy creating your own cards.
Vanias Reed    

Thursday, April 4, 2013

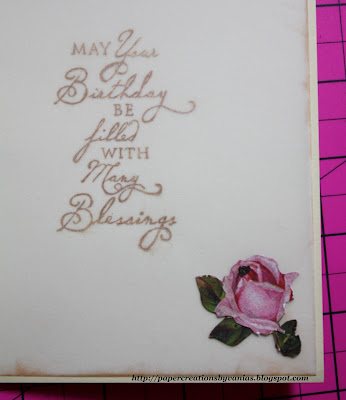
Vintage Birthday

I made this card for a very special young lady. She's talented, beautiful, and likes vintage style. I enjoyed making it so much that I decided to use the same style on a couple more cards, which I will be posting soon. 

Paper: Sand, pink, light blue vintage vanilla cardstock; velum paper (Paper Studio).
Tools: Craft knife, precision scissors, permanent dot runner, embossing and cutting machine (Big Kick by Sizzix), circle punch, gray colored pencil and brown fine writing pen, computer and printer.
Stamps: Happy Birthday, May your birthday... (Stampabillities)
Stamp ink: brown, black, yellow 
Embellishments: paper roses, Eiffell Tower and picture corner (Spare Parts), pink ribbon, lace with pearls, dark brown pearls.

You can give your card an 'old look' using two tones of brown distress or stamp ink. Just rub the stamp pad gently on the edges of the velum paper.
Let me know if you have any questions.
Have a wonderfully blessed day.
Vanias Reed      

Tuesday, April 2, 2013

Pillow Box

We have learned how to make gift bags and square boxes, now we are going to make a pillow box. Pillow boxes are so cute  and fun. So here is the one I made. There is a template for you too. Enjoy.
 Paper: purple cardstock.
Tools: 1/8" punch, scissors, paper creaser, craft knife and rule
Embellishments: 1/4" white ribbon and silver 'pearl'
Extras: Computer and printer

Right click on the picture to save in your computer and/or print. If you want to make a printer box, adjust your printer to custom and enlarge the picture.
 
Cut the template, place it on the cardstock paper and trace the box. Cut it on the black line. Fold it on the dotted lines. Punch two holes on the top flap, fold it over the box and mark where the two other wholes will be punched. Pass the ribbon through the holes and make a bow. Add the embellishment of your preference. The top of the box will be closed. But, like any pillow box, the sides will be used to put the gift in, and to get it out as well.

I hope you have as much fun making this project as I did.
Happy Crafting.
Vanias Reed    
 

Monday, April 1, 2013

Gift Bag 2

We made a gift back a couple of weeks ago, and I decided to change it a little. Here is the other bag.
 As you can see, this bag has a handle on the top, the top flap is bigger and it closes.
You will fold the top wider than the bag #1, punch the small holes, and settle the eyelets there. 
  Use a ribbon to make the handle. Pass both ends through the holes and glue them to the paper. Score and crease top of bag at 1" and paste over the ends of handle.
Cut a 3"x 5" piece of the same paper or a matching one, crease at 1/4" and glue it to the top of the bag to make the top flap. Decorate it as you please.

 
Glue pieces of velcro on both top flap and bag to close it.


And here is your final product
 
The side and the bottom of the bag will look the same as bag #1
Let me know if you need anymore information on how to make the gift bags.

Happy crafting!
Vanias Reed